
What to Expect From a Real Estate Photo Shoot
How the Real Estate Photo Shoot Process Works From Start to Finish
Booking professional photography is one of the most effective ways to elevate a property listing, yet many homeowners and agents are unsure what actually happens once a shoot is scheduled. Understanding the real estate photo shoot process helps set clear expectations, reduces last-minute stress, and ensures the final images truly support your marketing goals.
A professional shoot involves far more than simply showing up with a camera. It is a coordinated workflow that blends preparation, timing, technical skill, and post-production. When done correctly, real estate photography highlights a property’s strengths, minimizes distractions, and creates a visual story that attracts serious buyers online.
This guide walks you through exactly what to expect before, during, and after a shoot. Whether you are a homeowner, real estate agent, builder, or investor, knowing how the process works will help you prepare confidently and get maximum value from your photography investment.
Why Preparation Matters More Than the Camera
Professional equipment plays an important role, but preparation has an even greater impact on the final results. Clean, decluttered, and well-lit spaces always photograph better than rushed or unfinished rooms, regardless of the camera used.
Before the shoot, the goal is to present the property in its most polished, show-ready condition. This allows the photographer to focus on composition, lighting, and storytelling rather than problem-solving.
Proper preparation:
- Maximizes visual appeal
- Reduces editing time
- Prevents reshoots
- Improves listing performance
This is one of the key reasons why real estate photography is important in today’s digital-first market. Buyers form opinions within seconds of seeing listing photos.
Step-by-Step Breakdown of the Real Estate Photo Shoot Process
Step One: Pre-Shoot Planning and Scheduling
The process begins with scheduling the shoot at the right time. A professional photographer for real estate listings considers daylight direction, weather, and property orientation to determine the best window for shooting.
Purpose: Capture natural light at its best.
Tip: Mid-morning to early afternoon often works well for interiors in many U.S. markets.
This planning stage is essential for both residential and commercial real estate photographer assignments.
Step Two: Preparing the Property
Before the photographer arrives, the property should be fully cleaned, decluttered, and lightly staged. Personal items, excess furniture, and countertop clutter should be removed.
Purpose: Create clean, distraction-free visuals.
Tip: Think model home rather than lived-in space.
This preparation step directly affects the quality of real estate property photography and the amount of post-production required.
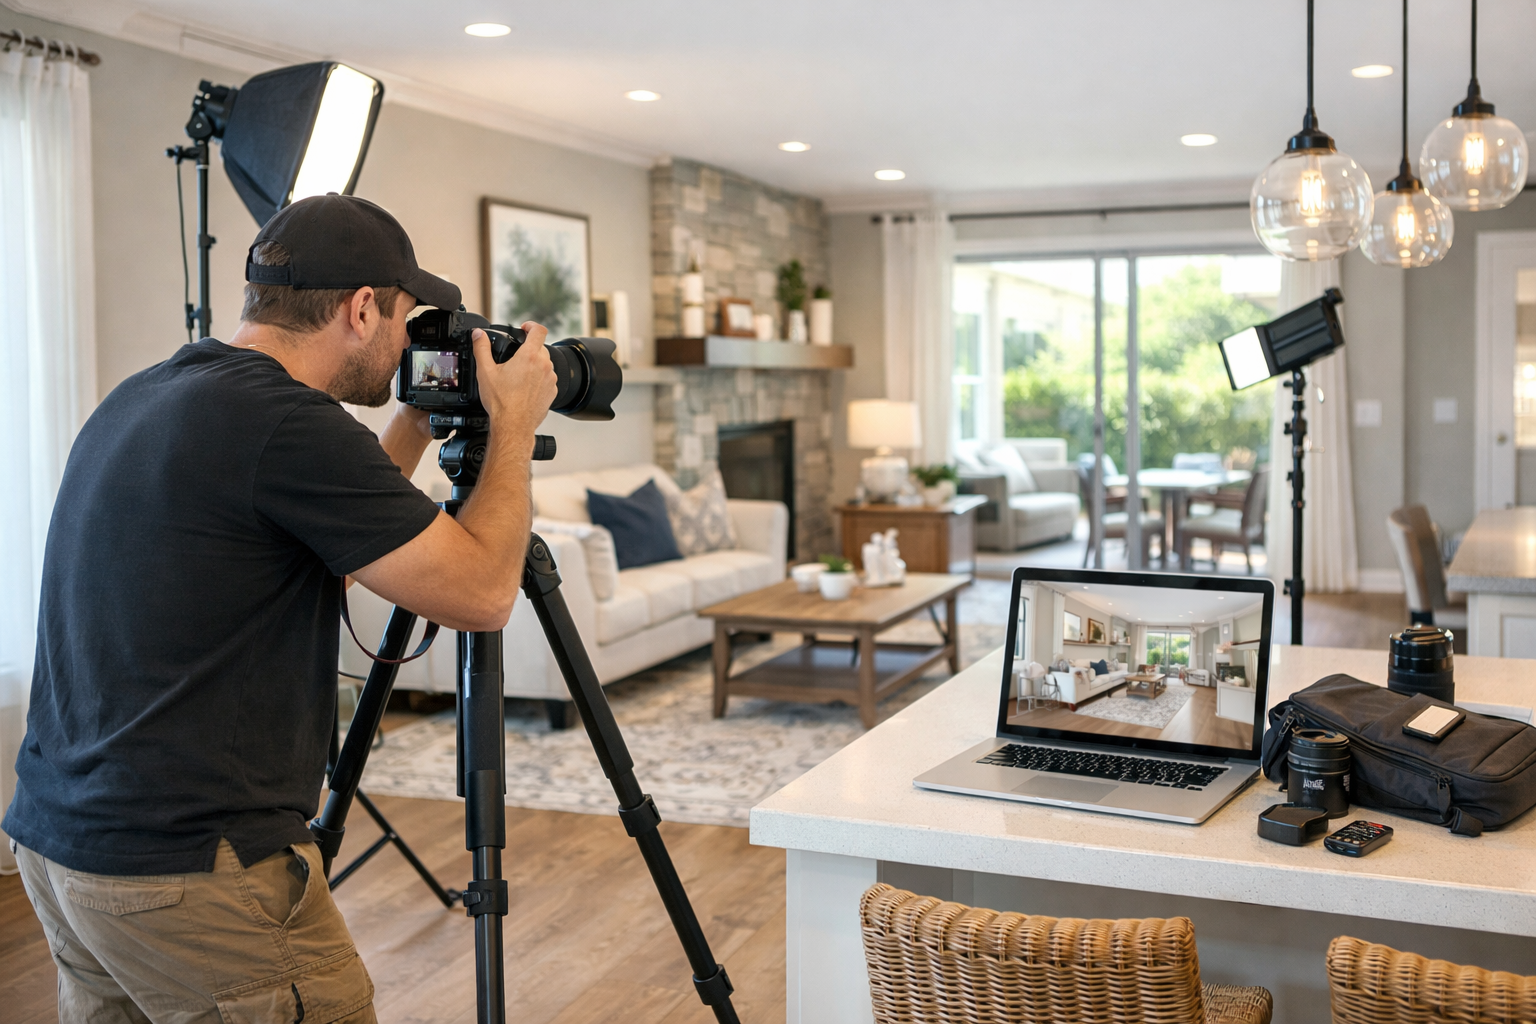
Step Three: Photographer Walkthrough and Setup
Once on site, the photographer walks through the property to plan angles, lighting setups, and shooting order. Equipment, lenses, and lighting are adjusted room by room.
Purpose: Identify the strongest compositions for each space.
Tip: Trust the photographer’s guidance on small adjustments like furniture placement or curtain positioning.
This collaboration is a key part of effective photography for real estate.
Step Four: Capturing Interior and Exterior Images
The photographer captures each key area with careful attention to lighting balance, straight verticals, and room flow. Exterior shots focus on curb appeal, perspective, and context.
Purpose: Showcase layout, space, and features clearly.
Tip: Not every room needs to be photographed, only those that add value or help tell the home’s story.
Some shoots may also include real estate portraits of agents or team members for branding and marketing use.
Step Five: Post-Production and Delivery
After the shoot, images go through professional editing to ensure proper brightness, color accuracy, and consistency across the full gallery. Final images are delivered ready for MLS, websites, and real estate photography marketing materials.
Purpose: Deliver polished, professional visuals that represent the property accurately.
Tip: Editing enhances realism and consistency. It does not replace proper preparation.
What Homeowners and Agents Experience in Practice
Many sellers are surprised by how efficient the real estate photo shoot process feels. Most sessions last one to two hours, depending on property size and scope.
Agents often remain on site to provide access and assist with final touches. Homeowners typically step out during the shoot to avoid distractions. For vacant properties, the focus is on architecture and scale. For occupied homes, framing minimizes personal elements while emphasizing lifestyle.
Agents consistently report higher online engagement and stronger first impressions when professional photography is used. This reinforces why real estate photography is important for competitive listings across the United States.
Best Practices to Ensure a Successful Photo Shoot
Following these proven best practices helps avoid common issues and ensures the best outcome:
- Finish cleaning before the photographer arrives
- Turn on all lights for consistent exposure
- Hide personal items and valuables
- Secure pets off-site if possible
- Trust the professional process and guidance
These real estate photography tips may seem simple, but they make a significant visual difference.
Why Working With a Professional Media Team Matters
Real estate photography is both a technical skill and a marketing discipline. Professionals understand how buyers view listings online and how images influence perception, value, and urgency.
Working with an experienced team like Brooke Haven Media ensures a smooth and reliable real estate photo shoot process from start to finish. Their approach combines visual storytelling with market awareness, helping listings stand out rather than blend in.
To learn more, explore their services, visit their website, or get in touch through their contact page.
Final Thoughts on the Real Estate Photo Shoot Process
Understanding the real estate photo shoot process helps sellers and agents prepare confidently and avoid unnecessary stress. From thoughtful preparation and professional execution to polished final delivery, each step plays a role in how a property is perceived online.
High-quality photography does more than make a listing look good. It supports stronger engagement, better first impressions, and more effective marketing outcomes. When handled by experienced professionals, the process becomes a strategic advantage rather than a simple task.
Frequently Asked Questions About Real Estate Photo Shoots
How long does a real estate photo shoot take?
Most shoots take one to two hours, depending on property size and scope.
Do I need to be home during the shoot?
No. Many homeowners choose to leave while the photographer works.
Should every room be photographed?
Only spaces that add value or help tell the property’s story.
How soon are photos delivered?
Most professional services deliver images within 24 to 48 hours.
Is professional photography worth the investment?
Yes. Professional images consistently lead to stronger engagement and faster sales.