
Photo Preparation Checklist for Sellers
First Impressions Start Online: How to Prepare Your Home for Listing Photos
The moment your listing goes live, buyers start forming opinions in seconds. Long before they read the description or check the price, they scroll through photos. If the images feel cluttered, dark, or uninviting, many buyers move on without ever scheduling a showing. That is why knowing how to prepare home for listing photos is not optional, it is essential.
Many sellers believe hiring a professional photographer alone guarantees great results. In reality, the homes that photograph best are the ones prepared intentionally before the camera ever comes out. Cluttered countertops, uneven lighting, crowded furniture, and personal items all show up clearly in high-resolution images. Proper preparation allows professional photography to highlight space, flow, and lifestyle rather than distractions.
In this guide, you will find a clear, seller-friendly checklist that explains exactly how to get house ready for listing photos. These steps are designed to support professional photography, improve buyer engagement online, and help your home stand out on MLS and listing platforms.
By the end, you will know:
- What to clean, remove, and stage before photos
- How to make rooms look brighter and more spacious
- Which final details elevate listing pictures from average to exceptional
Why Photo Preparation Matters for Real Estate Listings
Preparing your home for photos is about more than tidying up. Real estate photography is a marketing tool, and every image is meant to help buyers imagine living in the space. When you properly prepare home for real estate photos, you give that visual story room to work.
Professional photographers use wide-angle lenses, careful composition, and strategic lighting. While these tools enhance a home, they also reveal details sellers might overlook. Smudges, clutter, crooked décor, and poor furniture placement become more noticeable on camera than in person. Preparation ensures those details work in your favor.
Well-prepared homes benefit from:
- Stronger first impressions online
- More clicks, saves, and inquiries
- Increased showing requests
- Higher perceived value and care
Contrary to popular belief, preparation does not require expensive upgrades. Most improvements come from organization, cleaning, and thoughtful staging photography. Even modest homes can look exceptional when prepared correctly.
Step-by-Step Checklist to Prepare Home for Listing Photos
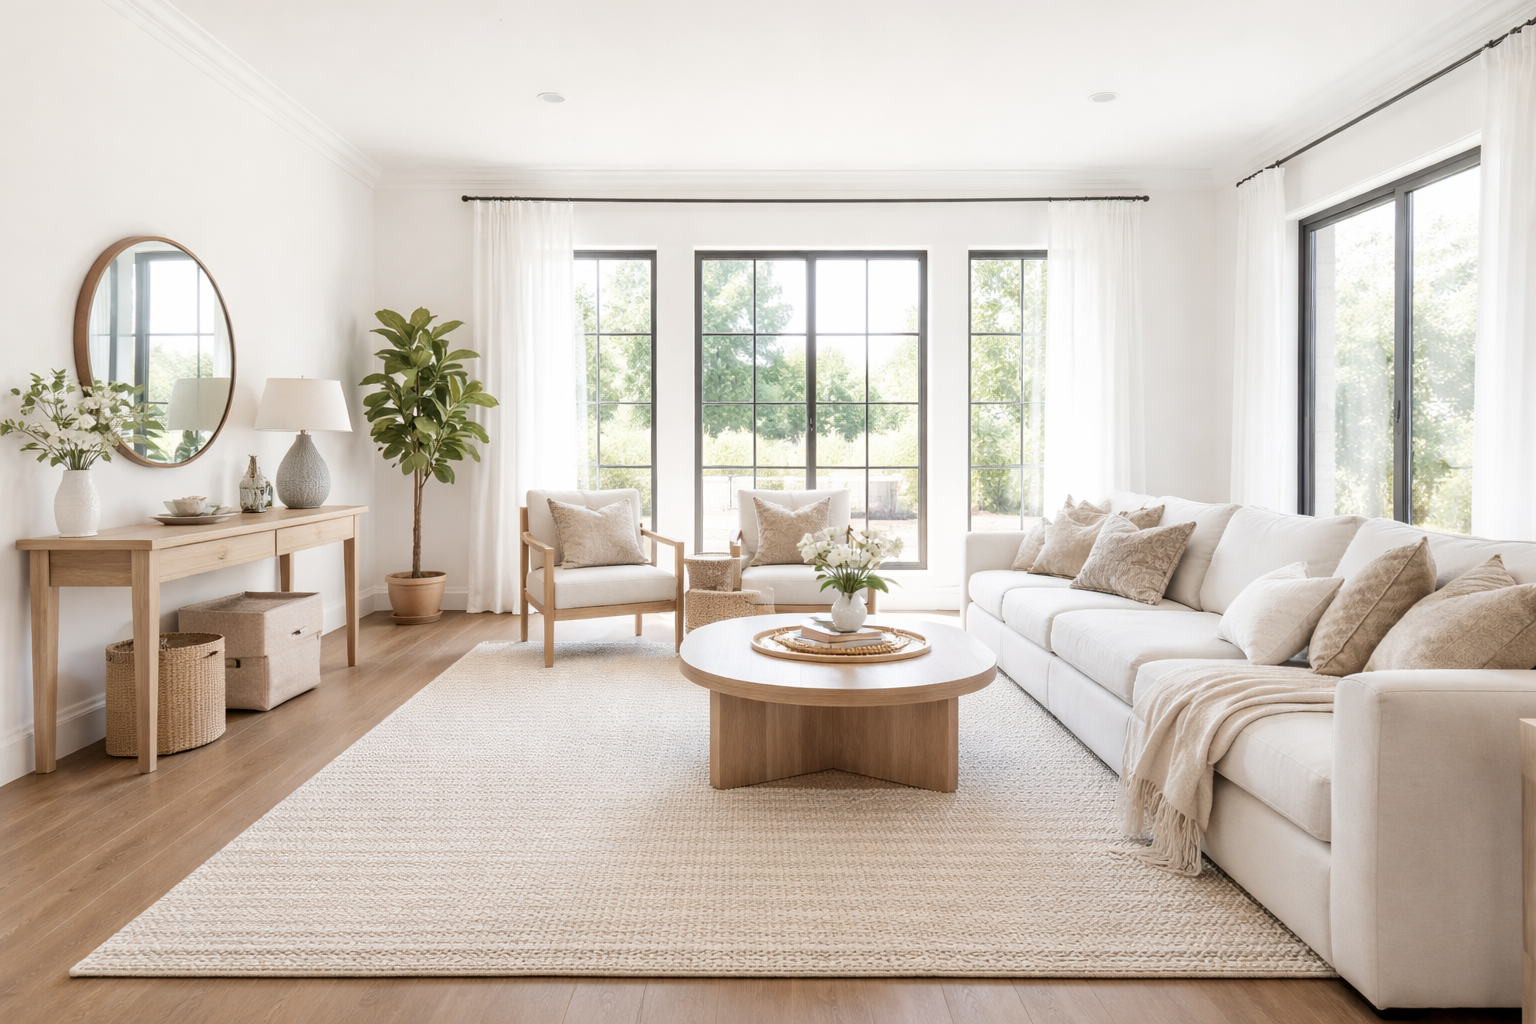
Step 1: Declutter Every Visible Surface
Purpose: Decluttering makes rooms feel larger, calmer, and more inviting in listing pictures.
Remove items from countertops, tables, shelves, and floors. Kitchens should show minimal items, no mail, small appliances, or excess décor. Bathrooms should display only clean towels and one simple accent. Living spaces benefit from clear surfaces that allow the eye to rest.
Closets, entryways, and hallways matter too. Even if they are not heavily photographed, clutter limits angles and light during interior real estate photography.
Pro tip: If you are unsure whether an item belongs in photos, remove it. Less almost always photographs better.
Step 2: Deep Clean for the Camera
Purpose: Cleanliness communicates care, maintenance, and move-in readiness to buyers viewing photos online.
Focus on deep cleaning rather than surface tidying. Floors should be spotless, windows streak-free, mirrors polished, and appliances clean. Kitchens and bathrooms deserve extra attention, buyers examine these rooms closely in photos.
Do not forget baseboards, ceiling fans, vents, and light switches. High-resolution images highlight details that might otherwise go unnoticed.
Exterior real estate photography matters too. Sweep patios, clean outdoor furniture, and remove debris so exterior shots feel welcoming.
Step 3: Maximize Natural and Artificial Light
Purpose: Bright homes photograph better and feel more open.
Open all blinds, curtains, and shades before the shoot. Replace burned-out bulbs and keep lighting temperatures consistent throughout the house. Soft white or warm white bulbs typically photograph best.
Move furniture that blocks windows or doors, even temporarily. For darker rooms or hallways, turn on lamps and overhead lights to balance exposure.
Clean windows inside and out. Natural light is most effective when glass is spotless.
Step 4: Arrange Furniture to Show Flow and Space
Purpose: Furniture placement helps buyers understand layout, scale, and function.
Create clear walkways and natural focal points. Pull furniture slightly away from walls to add depth, and remove extra pieces that make rooms feel crowded. Bedrooms should feel calm and open. Living rooms should show conversation areas. Dining rooms benefit from simple, balanced layouts.
If a room feels tight, remove one or two items. Cameras reward open space more than in-person showings.
This step is especially important when planning a real estate photography shot list, since layout determines which angles work best.
Step 5: Finish With Final Photo-Ready Details
Purpose: Final touches elevate listing pictures from good to polished.
Make beds neatly with smooth, wrinkle-free bedding. Straighten pillows, align chairs, and center rugs. Add subtle touches like greenery or a simple bowl of fruit, but avoid overdecorating.
Remove personal photos, toiletries, pet items, trash cans, and cords. Turn off TVs, monitors, and ceiling fans to keep visuals clean.
Before the photographer arrives, walk through each room with a camera mindset and look for reflections, clutter, or small distractions.
How Professional Photography and Preparation Work Together
Knowing how to take real estate photos professionally is only half the equation. The other half is preparation. Professional photographers rely on sellers to provide a clean, staged foundation so they can focus on lighting, composition, and storytelling.
Working with a specialized real estate media company like Brookehaven Media ensures your listing photos are captured with market-driven strategy, not just technical skill. Their team focuses on showcasing homes in a way that aligns with buyer expectations and online listing performance.
You can explore their approach on the Brookehaven Media website or review the full range of offerings through their services page. For sellers unsure how to choose the right photographer, this guide on how to choose a real estate photographer provides helpful insight.
Real-World Results From Proper Photo Preparation
Traditional sellers who follow this checklist often see immediate benefits. One occupied home used decluttering, lighting adjustments, and furniture rearrangement to improve photos. The listing generated higher engagement and more showings within the first week.
Vacant homes benefit just as much. By focusing on light, clean lines, and minimal staging photography, empty spaces photograph larger and more inviting.
In smaller homes or condos, preparation can significantly reduce buyer hesitation about size by emphasizing openness and flow.
Common Mistakes to Avoid When Preparing Listing Pictures
- Overdecorating and creating visual clutter
- Mixing different light bulb colors
- Leaving personal items in view
- Rushing preparation at the last minute
- Assuming the photographer will “fix it later”
Preparation mistakes often limit the effectiveness of even the best photography.
Final Thoughts on Preparing Your Home for Listing Photos
Learning how to prepare home for listing photos is one of the most valuable steps a seller can take. When preparation supports professional photography, your listing pictures work harder, attract more attention, and build buyer confidence before the first showing.
By decluttering, cleaning, optimizing light, staging intentionally, and refining final details, you give your home its best chance to stand out online. These steps require planning and care, not major renovations.
If you are planning professional photos or want guidance on next steps, you can reach out directly through contact Brookehaven Media to ensure your listing photography is supported by expert preparation and execution.
Frequently Asked Questions About Preparing Home for Listing Photos
How far in advance should I prepare my home for listing photos?
Start 3–5 days in advance to allow time for decluttering, deep cleaning, and lighting adjustments. Final touch-ups should happen the day before or morning of the shoot.
Do I need professional staging to prepare home for listing photos?
Not always. Many homes photograph well with decluttering, furniture rearrangement, and neutral décor. Professional staging can help in vacant or high-end listings.
Should I prepare outdoor areas too?
Yes. Exterior real estate photography is often the first impression buyers see. Clean patios, mow lawns, and remove clutter.
What items should always be removed before photos?
Personal photos, toiletries, pet items, trash cans, cords, and excess décor should be removed.
Does preparation really impact buyer interest?
Yes. Homes that are properly prepared for listing photos consistently receive more engagement, showings, and stronger buyer interest.